
How to Alphabetize in Excel
Jan 19, 2026Alphabetizing data in Excel is one of those small skills that makes a big difference. Whether you’re working with names or product lists, sorting things from A to Z helps you stay organized and find information faster.
The good news is that Excel makes this easy once you know where to click. In this guide, you’ll master how to alphabetize in Excel in simple ways, from quick one-click sorting to more advanced options for larger tables.
Get our free Excel formulas cheat sheet
Plus new tutorials and template drops. Enter your email and we'll send it over.
-
Use the A–Z and Z–A buttons on the Data tab for the fastest way to alphabetize a single column.
-
Always choose Expand the selection when prompted to keep related rows together.
-
Use filters to quickly sort columns alphabetically, especially in tables with headers.
-
Open the Sort dialog box when you need to alphabetize by multiple columns or apply custom sorting rules.
-
Change the sort orientation to left to right to alphabetize rows instead of columns.

Quickest Way to Alphabetize a Column
The fastest way to alphabetize a column in Excel is by using the dedicated sort buttons located on your Ribbon. This method is perfect when you have a simple list or a single column of data that needs to be organized immediately.
Step 1: Click on any cell in the column you want to alphabetize. You do not need to select the entire column.

Step 2: Go to the Data tab on the Excel ribbon.

Step 3: In the Sort & Filter group, click A → Z to sort alphabetically from A to Z.
Use Z → A if you want to sort in reverse order.
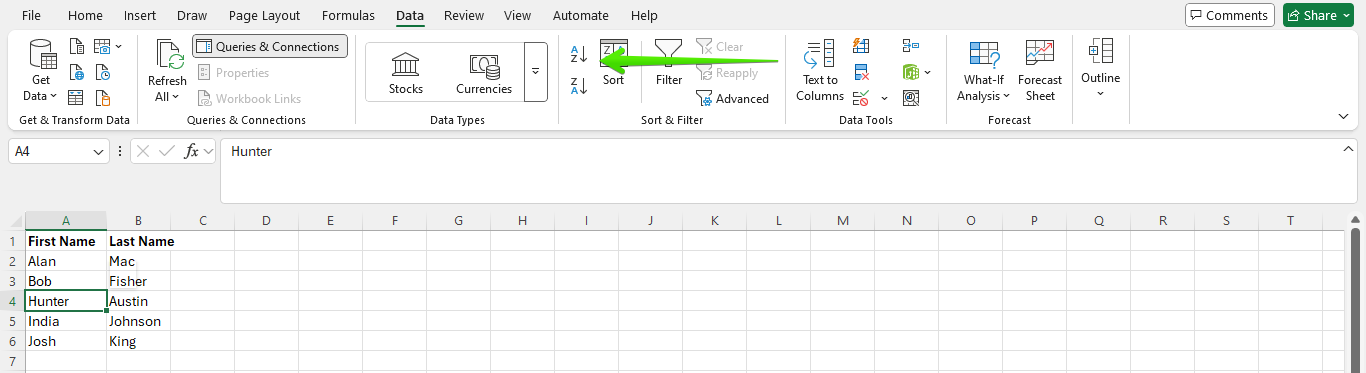
Step 4: If Excel asks how you want to sort, choose Expand the selection, then click OK.
This keeps all related rows aligned correctly.
Read more: How to Sort by Date in Excel.
Using Filters to Alphabetize
Filtering is another simple way to alphabetize in Excel, especially when your list already has column headers. Filters are useful when you want to sort one column and quickly switch between different sorting options without reopening menus.
Step 1: Select any cell inside your data range.
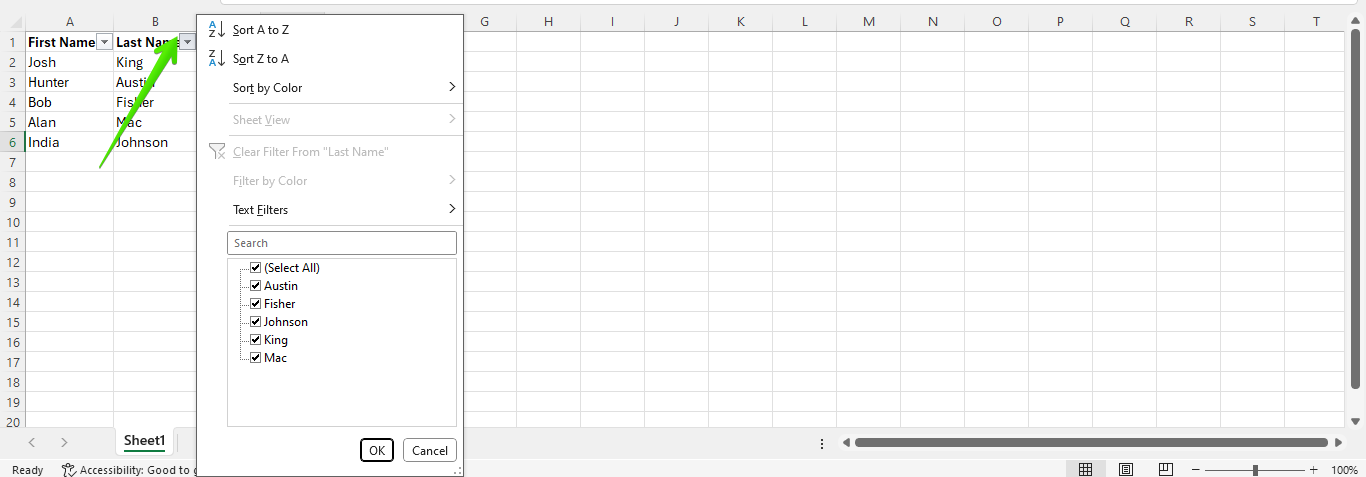
Step 2: Go to the Data tab and click Filter. Small drop-down arrows will appear next to each column header.

Step 3: Click the drop-down arrow in the column you want to alphabetize.
Step 4: Choose Sort A to Z to arrange the data alphabetically. Select Sort Z to A if you want the reverse order.
Using the Sort Dialog Box for Multiple Columns
While the earlier methods are fast, the Sort Dialog Box is the "pro" way to alphabetize. It gives you more control and allows you to sort by multiple criteria at once.
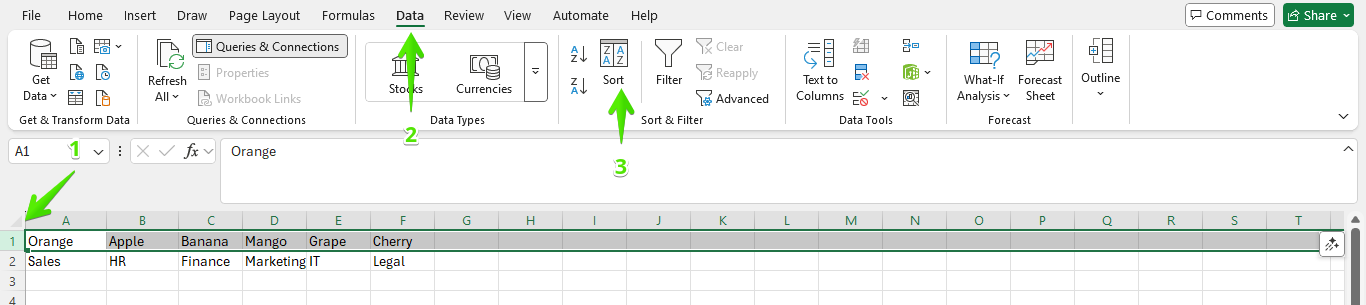
Step 1: Click and drag to select the entire range of data you want to sort. (Or, click any cell within your data range and press Ctrl + A).
Step 2: Go to the Data tab and click the large Sort button.

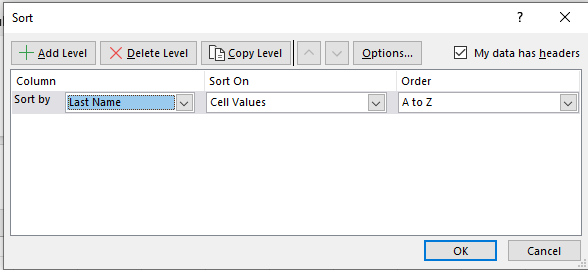
Step 3: In the top-right corner of the pop-up window, make sure the box "My data has headers" is checked. This tells Excel not to move your titles.
Step 4: Under "Column," choose the specific column name you want to alphabetize from the dropdown menu.
Step 5: Ensure "Sort On" is set to Cell Values and "Order" is set to A to Z.
Step 6: Your table will now be perfectly organized.
Sorting Rows Alphabetically (Left to Right)
Excel sorts data top to bottom by default. To alphabetize a row instead of a column, you need to change the sort orientation.
Step 1: Select the entire row you want to alphabetize. If the row is part of a table, select the full data range instead.
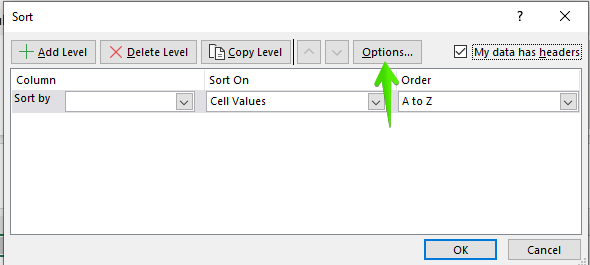
Step 2: Go to the Data tab and click Sort. This opens the Sort dialog box.
Step 3: Click Options in the Sort dialog box.
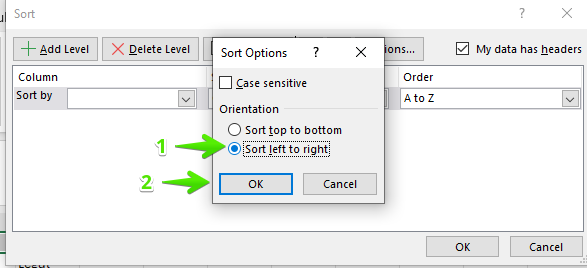
Step 4: Under Orientation, choose Sort left to right, then click OK.
Step 5: In the Sort by drop-down, select the row number you want to sort.
Step 6: Set Sort On to Cell Values and choose A to Z under Order.
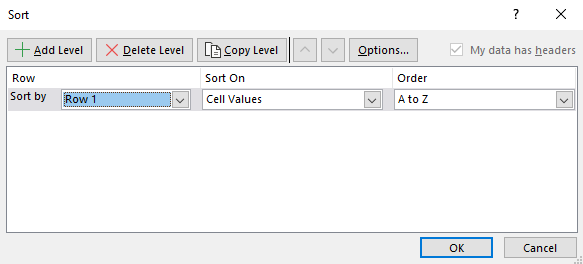
Step 7: Click OK to apply the sort.
Common Sorting Mistakes and How to Fix Them
Even though sorting in Excel is simple, a few common mistakes can cause messy or confusing results. Here’s how to spot them and fix them quickly.
1: Only one column is sorted.
This happens when Excel sorts a single column instead of the full table.
Solution: When the sort warning appears, always select Expand the selection. This keeps every row aligned correctly.
2. Header row Ggets mixed into the data.
Your column headers end up sorted alphabetically with the rest of the data.
Solution: Open the Sort dialog box and make sure My data has headers is checked before sorting.
3. Numbers sort incorrectly.
Values like 10 appear before 2, even though that doesn’t look right.
Solution: Those numbers are stored as text. Convert them to numbers using Text to Columns or by removing apostrophes before sorting.
4. Blank cells break the sort order.
Blank cells can cause Excel to stop sorting partway through a list.
Solution: Fill in blank cells or select the entire data range manually before sorting.
5. Sorting only part of a table.
Excel doesn’t recognize your data as one complete table.
Solution: Turn your data into a table using Ctrl + T, then sort using the header arrows.
Final Thoughts
Knowing how to alphabetize in Excel makes your data clearer and easier to scan. From quick A–Z sorting to advanced multi-column and left-to-right sorting, each method helps you stay in control of your spreadsheet as it grows. Master and understand when to use each option to make sorting a reliable tool. With these techniques, you can organize Excel data accurately and keep your work professional and well-structured every time.
Want to Make Excel Work for You? Try out 5 Amazing Excel Templates & 5 Unique Lessons
We hate SPAM. We will never sell your information, for any reason.

