Excel Conditional Formatting Based on Another Cell
Jan 04, 2025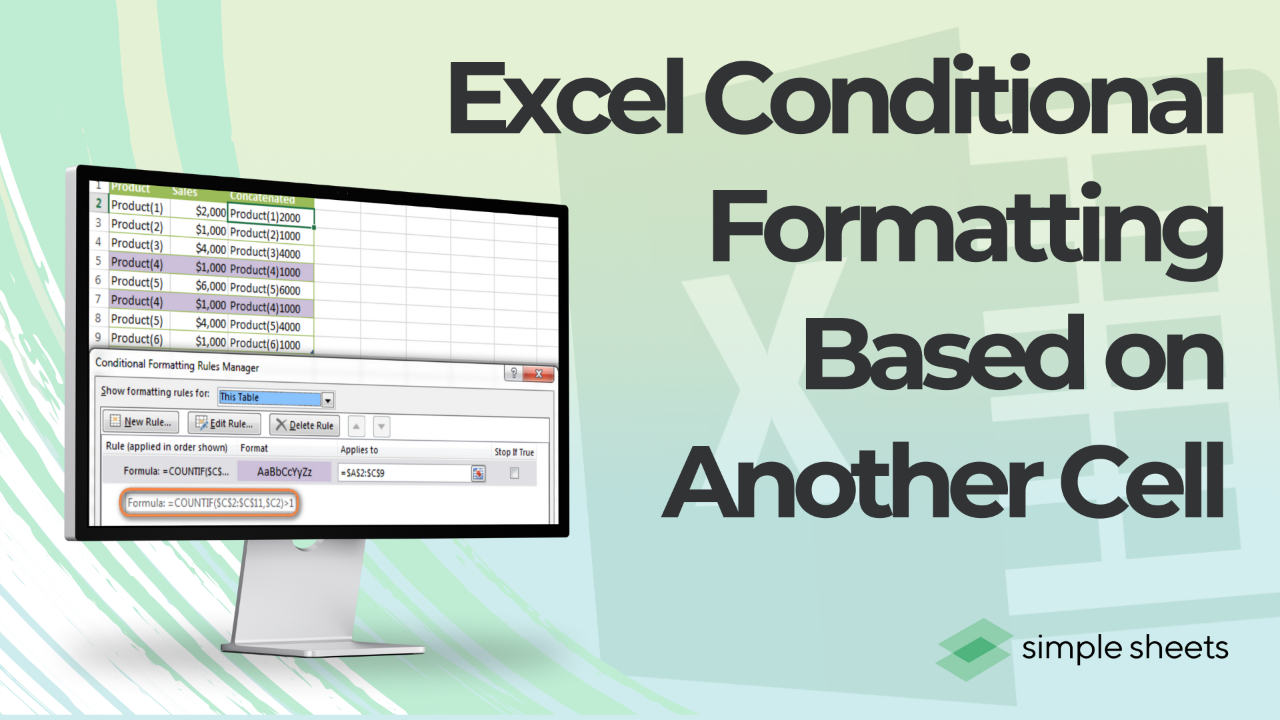
To format a cell based on another cell in Excel, select the range you want coloured, go to Home > Conditional Formatting > New Rule > Use a formula to determine which cells to format, and enter a formula such as =$D2="Overdue". Write the formula as if it applies to the top-left cell of your selection, and lock the column with a dollar sign.
Last updated: August 18, 2026
Do you need Excel to highlight important data for you automatically?
Conditional formatting makes this happen, and it gets far more useful once you can format a cell based on the value of a different cell. You can highlight overdue tasks, flag high priority items, or colour a whole row from a single status column, with no manual effort required.

Get our free Excel formulas cheat sheet
Plus new tutorials and template drops. Enter your email and we'll send it over.
Table of Contents
- What does "based on another cell" actually mean?
- How do you apply conditional formatting based on another cell?
- Absolute, relative and mixed references: why the wrong cells get coloured
- What is the Applies to range and why does it matter?
- How do you highlight an entire row based on one cell?
- Seven conditional formatting formula examples
- How do you format based on multiple values in another cell?
- How do you compare two columns and highlight the differences?
- How do you reference another worksheet in a rule?
- How do rule order and Stop If True work?
- How do you handle dates and blank cells?
- How do you copy conditional formatting without copying the values?
- Why is my conditional formatting not working?
- Frequently Asked Questions
What Does "Based on Another Cell" Actually Mean?
Excel's built-in rules such as Highlight Cell Rules and Data Bars only look at the cell they are colouring. The moment you want the colour of cell A2 to depend on what is in D2, you have to use the formula route instead.
That covers most real spreadsheet work:
-
Highlighting overdue tasks by referencing a due date column.
-
Marking rows where sales exceed a target held in one separate cell.
-
Colouring a task row grey the moment its status column says Complete.
-
Flagging a value that does not match the same row in a second column.
Quotable rule: if the colour depends on any cell other than the one being coloured, you need "Use a formula to determine which cells to format". There is no other route.
How Do You Apply Conditional Formatting Based on Another Cell Value?
Here is the full formula route, step by step. Microsoft's own overview of the feature is in the conditional formatting documentation if you want the official reference alongside this walkthrough.
1. Select the target range first.
Select the cells you want to colour, not the cells you want to test. This is the step people get backwards. If you want to colour column A based on column D, select column A.
Select from the top down, so that the first cell of your selection is the row your formula will describe. If your data starts in row 2, select A2 downwards, not A1.

2. Open the conditional formatting menu.
Go to the Home tab on the ribbon, then click Conditional Formatting in the Styles group.

3. Create a new rule.
Choose New Rule, then pick Use a formula to determine which cells to format from the rule type list. This is the only rule type that can look at a different cell.

4. Enter a formula that returns TRUE or FALSE.
The formula must evaluate to TRUE or FALSE, and you write it as if it applies to the very first cell in your selection. Excel then rolls it across the rest of the range for you. For example:
-
To highlight pending tasks, use =$D2="Pending"
-
To highlight low priority tasks, use =$C2="Low"
-
To highlight anything over a target stored in one fixed cell, use =$B2>$H$1
Note the dollar signs. They are not decoration, and the next section explains exactly what each one does.
Read more: What does $ mean in Excel?
5. Set the formatting style.
Click the Format button to choose how the cells should look. You can adjust font colour, cell fill, borders and number format. Click OK once you have made your choices.

6. Apply, then check the Applies to box.
Click OK to apply the rule. Then reopen Conditional Formatting, Manage Rules, and confirm the Applies to range is what you expected. This is where most broken rules reveal themselves.

Absolute, Relative and Mixed References: Why the Wrong Cells Get Coloured
This is the single biggest source of conditional formatting bugs, and it is worth two minutes of your time because it explains almost everything that goes wrong later.
Excel writes your formula once for the top-left cell of the range, then shifts it for every other cell exactly the way it would shift a copied formula. A dollar sign freezes the part it precedes.
| Reference | Name | What moves | Use it when |
|---|---|---|---|
| A2 | Relative | Both column and row shift | Each cell should test itself |
| $A$2 | Absolute | Nothing moves | Every cell compares against one fixed cell, such as a target |
| $A2 | Mixed, column locked | Row shifts, column stays on A | Every cell in a row tests the same column. This is the one you need for whole-row highlighting |
| A$2 | Mixed, row locked | Column shifts, row stays on 2 | Every cell in a column tests the same header row |
A worked example. You select A2:E100 and enter =$D2="Overdue". For cell A2 Excel tests D2. For B2 it still tests D2, because the column is locked to D. For A3 it tests D3, because the row is free to move. That is exactly what whole-row highlighting requires.
Now drop the dollar sign and use =D2="Overdue" on the same range. Cell A2 tests D2, but cell B2 tests E2 and cell C2 tests F2. The colour appears in a diagonal stripe pattern, which is the classic symptom of a missing dollar sign.
Quotable rule: lock the column with $D2 when the test column is fixed and the row varies. Use $D$2 only when every single cell should compare against one unchanging cell.
What Is the Applies To Range and Why Does It Matter?
Every rule stores two things: the formula and the range it applies to. Open Conditional Formatting > Manage Rules and you will see the Applies to box next to each rule.
Three things regularly go wrong here:
- The range does not cover new rows. Rules do not extend automatically unless the data is a formatted Table. Convert your range to a Table with Ctrl + T and the rule grows with it.
- The range got split into fragments. Deleting or inserting rows can shatter one rule into several with ranges like $A$2:$A$14,$A$16:$A$40. Retype a single clean range in the Applies to box.
- The top-left cell moved. If you edit the Applies to range so that it now starts at row 1 instead of row 2, your =$D2 formula is suddenly off by one row and every colour shifts.
Quotable rule: the formula is written for the top-left cell of the Applies to range. Change one and you must check the other.
How Do You Highlight an Entire Row Based on One Cell?
This is the most requested version of the technique, and it is just the mixed reference rule applied to a wider selection.
- Select the full width of your data, for example A2:F200. Do not include the header row.
- Home > Conditional Formatting > New Rule > Use a formula to determine which cells to format.
- Enter =$E2="Complete", where E is the status column and 2 is the first data row.
- Set your fill colour and click OK.
Every cell from A to F in a row now checks column E of its own row, so the whole row colours together.
To highlight a row when a date has passed, use =$C2<TODAY(). To highlight a row when a number is over target, use =$D2>$H$1, where H1 holds the target.
Quotable rule: whole-row highlighting is one selection wide and one dollar sign deep. Select every column, lock only the test column.
Seven Conditional Formatting Formula Examples
Each of these goes in the same place: New Rule, Use a formula to determine which cells to format.
1. How do you highlight numbers above a threshold in another cell?
Highlight cells where the value in column A exceeds the threshold held in $B$1 with =A1>$B$1.

Explanation: the cells containing 55, 60 and 70 in column A are highlighted when $B$1 contains 50. The threshold is fully absolute so every cell compares against that one benchmark. Change B1 and every colour updates instantly.
2. How do you format rows based on text in another column?
Apply formatting to rows where column C contains "Completed" with =$C1="Completed"

Explanation: rows with "Completed" in column C are highlighted. The text comparison is not case sensitive, so "completed" matches too. For a case sensitive version, use =EXACT($C1,"Completed").
3. How do you format when two conditions are both true?
To format cells only when column A is above 50 and column B is below 100, use =AND($A1>50, $B1<100)

Explanation: only rows meeting both conditions are highlighted. Swap AND for OR when either condition should be enough.
4. How do you highlight duplicate values?
Highlight duplicates in column A with =COUNTIF(A:A, A1)>1

Explanation: every value appearing more than once is highlighted. To highlight only the second and later occurrences, use =COUNTIF($A$1:A1, A1)>1, which counts from the top of the range down to the current row.
5. How do you compare two columns?
Another common job is comparing two columns. Highlight cells in column A that do not match column B with =$A1<>$B1

Explanation: rows where the values differ are highlighted. This is the standard reconciliation check between an expected list and an actual one.
6. How do you highlight the highest value in a column?
To format the cell holding the maximum value in column A, use =A1=MAX(A:A)

Explanation: the top value is highlighted. Swap MAX for MIN to flag the lowest, or use =A1>=LARGE(A:A,3) to highlight the top three. This is a handy Excel formula for spotting peak performance.
7. How do you highlight blank cells?
Format blank cells in column C with =C1=""

Explanation: blank cells in column C are highlighted so you can see gaps in the data. Be aware that =C1="" also treats a formula returning an empty string as blank. Use =ISBLANK(C1) if you want truly empty cells only.

How Do You Format Based on Multiple Values in Another Cell?
When a single column can hold several values that all deserve the same colour, you have three options.
- OR for two or three values: =OR($D2="Urgent", $D2="Escalated", $D2="Blocked")
- COUNTIF against a list for many values: =COUNTIF($H$2:$H$20, $D2)>0, where H2:H20 holds your list of trigger values. This scales without editing the rule.
- Partial text match: =ISNUMBER(SEARCH("urgent", $D2)) highlights anything containing the word, regardless of what surrounds it.
For different colours per value, create one rule per value rather than one clever rule. Rules are cheap and far easier to maintain.
Quotable rule: use OR for a handful of fixed values, COUNTIF against a helper list when the list will grow.
How Do You Compare Two Columns and Highlight the Differences?
Two different questions hide inside "compare two columns", and they need different formulas.
| What you want | Formula | Notes |
|---|---|---|
| Row by row mismatch | =$A2<>$B2 | Position matters. Row 5 is compared only to row 5 |
| Value missing from the other list | =COUNTIF($B:$B, $A2)=0 | Position does not matter. Use this for two unsorted lists |
| Case sensitive comparison | =NOT(EXACT($A2,$B2)) | Treats ABC and abc as different |
| Value appears in both lists | =COUNTIF($B:$B, $A2)>0 | The inverse, useful for confirming overlap |
Quotable rule: use <> when the two lists are in the same order, and COUNTIF when they are not.
How Do You Reference Another Worksheet in a Conditional Formatting Rule?
In Microsoft 365, Excel 2021 and Excel 2019, you can point a conditional formatting formula directly at another sheet:
=$B2>Targets!$B$1
In Excel 2007 and 2010, direct cross-sheet references in a conditional formatting rule are rejected. The workaround has not changed in fifteen years and still works everywhere:
- Go to the other sheet and select the cell or range you want to reference.
- Type a name into the Name Box to the left of the formula bar, for example TargetValue, and press Enter.
- Back on your data sheet, write the rule using the name instead of the sheet reference: =$B2>TargetValue
There is a second reason to prefer named ranges even on modern Excel: if someone renames the source sheet, a hard-coded Targets!$B$1 reference can break, while a defined name follows the move.
Quotable rule: if a cross-sheet reference is refused, wrap it in a named range. The name is accepted where the raw sheet reference is not.
How Do Rule Order and Stop If True Work?
When several rules apply to the same cell, Excel evaluates them from the top of the Manage Rules list downward and applies every rule that is TRUE. Later rules do not replace earlier ones, they layer on top, and the first rule wins on any property where they conflict.
So if rule 1 sets a red fill and rule 3 sets bold text, a cell matching both goes red and bold. If rule 1 sets red fill and rule 3 sets green fill, red wins because it sits higher.
Use the up and down arrows in Manage Rules to reorder. The general pattern is most specific at the top, most general at the bottom. A rule for "overdue and unassigned" belongs above a plain "overdue" rule.
What does Stop If True do?
Ticking Stop If True on a rule tells Excel that if this rule matches, it should stop evaluating anything below it for that cell. Two practical uses:
- Protecting exceptions. Put a rule with no formatting at the top with Stop If True, so rows meeting that condition are exempt from every rule underneath.
- Suppressing on blanks. A rule of =$D2="" with Stop If True at the top of the list stops empty rows from being coloured by any rule below.
Quotable rule: Excel applies every matching rule and the highest rule wins any conflict. Stop If True is the only way to make a lower rule not run.
How Do You Handle Dates and Blank Cells?
Dates are just numbers in Excel, so date rules are ordinary comparisons.
| Goal | Formula |
|---|---|
| Overdue, and ignore blanks | =AND($C2<>"", $C2<TODAY()) |
| Due in the next 7 days | =AND($C2>=TODAY(), $C2<=TODAY()+7) |
| Overdue only if not yet complete | =AND($C2<TODAY(), $E2<>"Complete") |
| Falls in the current month | =TEXT($C2,"mmm yyyy")=TEXT(TODAY(),"mmm yyyy") |
| Weekend date | =WEEKDAY($C2,2)>5 |
The blank-cell trap is worth spelling out. An empty cell evaluates as zero, and zero is smaller than today's date number, so a bare =$C2<TODAY() rule paints every empty row red. Always pair a date comparison with a blank check, as in the first row of the table.
Quotable rule: an empty cell counts as zero, so every "less than" date rule needs an "and it is not blank" test in front of it.
How Do You Copy Conditional Formatting Without Copying the Values?
A normal copy and paste carries the values, the formulas and the formatting together. Two ways to move only the rules:
- Format Painter. Click a cell that already has the rule, click Format Painter on the Home tab, then drag across the target range. Double-click Format Painter to keep it active for several ranges.
- Paste Special. Copy the source cell, right-click the target range, choose Paste Special, then Formats. This carries conditional formatting rules along with static formatting.
Then open Manage Rules and check the Applies to range. Both methods tend to create a second copy of the rule with a fragmented range rather than extending the original, and a pile of near-identical rules will slow a large workbook noticeably.
Quotable rule: after any Format Painter or Paste Special, open Manage Rules and merge duplicate rules back into one clean Applies to range.
Why Is My Conditional Formatting Not Working?
Work down this list in order. It resolves nearly every case.
| Symptom | Cause | Fix |
|---|---|---|
| Colour appears on a diagonal or in the wrong column | Missing dollar sign on the test column | Change D2 to $D2 |
| Everything is coloured, or nothing is | Formula written for the wrong first row | Match the row number in the formula to the first row of Applies to |
| New rows are not formatted | Applies to range is fixed | Extend the range, or convert the data to a Table with Ctrl + T |
| A text rule never matches | Trailing spaces or a different character | Use =ISNUMBER(SEARCH("word",$D2)) or clean with TRIM |
| A number rule never matches | Numbers stored as text | Use Text to Columns, or wrap in VALUE() |
| Two rules fight and the wrong one wins | Rule order | Move the specific rule above the general one in Manage Rules |
| Blank rows are coloured | Blank evaluates as zero | Add =AND($C2<>"", ...) to the rule |
| The file has become slow | Hundreds of duplicated fragment rules | Delete them in Manage Rules and recreate one rule over a clean range |
Final Thoughts
Conditional formatting based on another cell comes down to three decisions. Select the cells you want coloured rather than the cells you want tested. Write the formula for the top-left cell of that selection. Lock the test column with a dollar sign so the rule tracks across the row.
Get those three right and everything else in this guide is a variation on the same idea.
For more easy-to-follow Excel guides and the latest Excel Templates, visit Simple Sheets and the related articles section of this blog post.
Subscribe to Simple Sheets on YouTube for the most straightforward Excel video tutorials!
Frequently Asked Questions
1. How do I use conditional formatting based on another cell in Excel?
Select the cells you want coloured, then go to Home, Conditional Formatting, New Rule, Use a formula to determine which cells to format. Enter a formula such as =$D2="Overdue" written for the first cell of your selection, and set the format.
2. Can I use conditional formatting to highlight entire rows?
Yes. Select the full width of your data, then use a formula with the test column locked, for example =$E2="Complete". Because only the column is locked, every cell in the row checks the same status column while the row number moves down.
3. Why is my conditional formatting applying to the wrong cells?
Almost always a reference problem. If you wrote =D2 rather than =$D2, each column shifts its test one column to the right, producing a diagonal pattern. Lock the test column with a dollar sign.
4. What is the difference between $A$1, $A1 and A1 in a conditional formatting rule?
$A$1 is fixed and never moves. $A1 locks the column but lets the row move down the range, which is what whole-row highlighting needs. A1 lets both move, so each cell tests itself.
5. Can conditional formatting reference another worksheet?
Yes in Excel 2019, 2021 and Microsoft 365, using a formula such as =$B2>Targets!$B$1. In Excel 2007 and 2010 you must give the source cell a defined name in the Name Box and reference the name instead.
6. How do I highlight cells based on multiple values in another cell?
Use OR for a few values, as in =OR($D2="Urgent",$D2="Escalated"). For a longer or growing list, put the values in a helper column and use =COUNTIF($H$2:$H$20,$D2)>0.
7. Can I apply multiple conditional formatting rules to the same range?
Yes. Excel applies every rule that is true, working from the top of the Manage Rules list down, and the highest rule wins on any conflicting property. Use Stop If True to prevent lower rules running.
8. How do I copy conditional formatting without copying the values?
Use Format Painter, or copy the source cell and use Paste Special, Formats. Afterwards, open Manage Rules and merge any duplicate rules into a single Applies to range.
9. Why does my date rule colour blank cells?
An empty cell is treated as zero, which is less than today's date number. Add a blank check, for example =AND($C2<>"", $C2<TODAY()).
10. How do I stop conditional formatting from breaking when I insert rows?
Convert the data to a Table with Ctrl + T. Table ranges expand automatically, so the rule covers new rows without you editing the Applies to box.
Related Articles
Want to Make Excel Work for You? Try out 5 Amazing Excel Templates & 5 Unique Lessons
We hate SPAM. We will never sell your information, for any reason.